 |
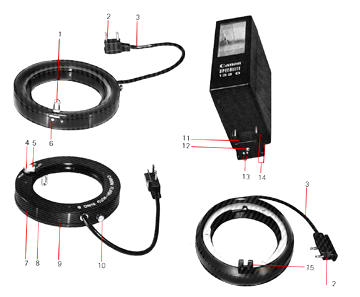
1. Distance Signal Pin Socket |
 |
|
How to Use the CAT System
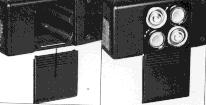
1. Flash Coupler L
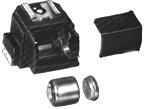
Load one 1.3V HD mercury battery for the signals of the CAT System and one 1.3V HP
mercury battery to illuminate the meter infor mation window.
 |
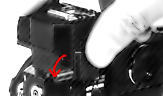 |
The cover can be removed by simply pulling in the direction of the arrow. |
The illumination battery will last for 40 hour in continuous use at normal temperatures. The voltage of the mercury battery for the signals of the CAT System can be checked when the coupler is attached to the F-1 body. When attaching the Coupler L to the camera, first release its stopper lever putting it down, attach the coupler to the accessory shoe and then lock the lever putting it back in place to fix the coupler.
 |
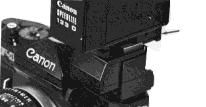
2. Speedlite 133D |
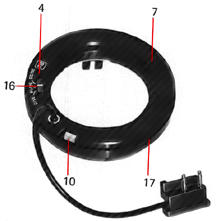
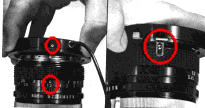
3. Flash-Auto Rings
A and B
Choose the A or the B Ring according to the lens you are going to use and turn the
lens selector to match the lens.
 |
When attaching the ring to the lens at the front, make the white index on the ring match the distance signal pin socket. Set the focusing ring to 1.2m with a 50mm lens and in the middle of 0.5 and 0.6m with a 35mm lens. |
Insert the distance signal pin of the lens into the socket of the Flash-Auto Ring matching the red index on the ring to the groove of the bayonet that serves to determine the position of the lens, and then turn the Flash-Auto Rin'g clockwise to lock it in position.
 |
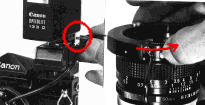 |
Insert the plug of the cord into the socket of the 133D. |
When detaching the Flash-Auto Ring, remove the connecting cord and turn it counterclockwise while depressing the lock release button, and pull it out when the distance signal pin socket is matching the red index.
4. Preparing for photography
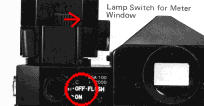 |
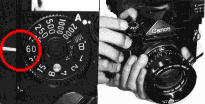
Set the meter switch of the camera at OFF FLASH. Set the shutter speed at 1/60 sec. Switch the light of the coupler on if the meter information in the viewfinder can not be seen clearly. Set the switch of the 133D at AUTO. |
5. Photographing
Focus the subject after the meter needle moves. Then align the aperture needle with
the meter needle by turning the aperture ring and depress the shutter release button.
 |
Note that before the meter needle moves in the proper exposure range, no proper exposure can be obtained due to improper shooting distance or insufficient voltage. But it is possible to focus before the needle moves. |
When detaching the Flash Coupler L, first disconnect the cord of the Flash-Auto Ring, then the coupler by pushing the stopper lever down, and slipping the coupler off.
| Next | Using the CAT or Normal Flash system
Concept | Reliability Issue | Motor Drive Units | Macro | EE Servo / Booster Finder | Bulk Film Back | CAT (Flash System | F1 High Speed | ODF-1 | Placid | Assembling Diaphragm | Canon FD & FDn lenses
| Back | to Main Index Page of Canon F-1(n)
| Message Board |
for your Canon F-1(n)
SLR camera(s)
| Message Board | for your Canon optics
in a shared environment
| Message Board | Specifically for Dispose or Looking for Canon Photographic
equipment
Other Canon
Resources: If
you
have a New Canon F-1...
Canon
FD Lenses Site | Canon A and T Series SLR models
About this photographic site.
![]()
![]()
Home - Photography
in Malaysia
Copyright
© 1999. leofoo ®. MIR Web Development Team.
MB
Maintenance Team
and Credit
information:
Kaipin & Terry Carraway. Mr. Richard Yeow, General Manager
-Optical Division of Canon
Marketing
and Tony Kano, former regioner head of Canon, Asean Region for granting special
permission to reproduce some of the old manuals into HTML format. *
Canon, T90, FD Lenses,
Canon
Marketing
are registered trade names or trademarks of Canon Inc. Japan.